
Use high-protein flour and let the dough rise sufficiently to make homemade bread less dense. Ensure proper kneading for gluten development.
Homemade bread can sometimes turn out dense and heavy, disappointing many home bakers. Achieving a light, airy texture isn’t complicated with a few simple adjustments. High-protein flour, such as bread flour, enhances gluten development, crucial for a softer crumb. Proper kneading ensures that gluten strands form correctly, trapping air bubbles and allowing the bread to rise well.
Adequate rising time is essential to let the dough expand fully. These tweaks can transform your dense homemade bread into a delightfully light and fluffy loaf, perfect for any meal.
Credit: fasteasybread.com
Choosing The Right Flour
Choosing the right flour is key to making homemade bread less dense. The type of flour you use can greatly affect the texture of your bread. Let’s explore the different types of flour and their protein content.
Types Of Flour
Not all flours are the same. Each type has unique properties that can impact your bread’s density.
- All-Purpose Flour: This is the most commonly used flour. It has a moderate protein content, making it versatile for many recipes.
- Bread Flour: Bread flour is high in protein. It helps create a strong gluten network, which makes the bread rise better.
- Whole Wheat Flour: This flour is made from whole grains. It has more nutrients but can make bread denser.
- Pastry Flour: Pastry flour has low protein. It is not suitable for making bread as it does not form enough gluten.
Flour Protein Content
The protein content in flour plays a crucial role in bread making. Higher protein means more gluten, which helps bread rise and become airy.
| Type of Flour | Protein Content (%) |
|---|---|
| All-Purpose Flour | 10-12% |
| Bread Flour | 12-14% |
| Whole Wheat Flour | 13-14% |
| Pastry Flour | 8-9% |
Choosing flour with the right protein content is essential. For less dense bread, opt for bread flour with higher protein.
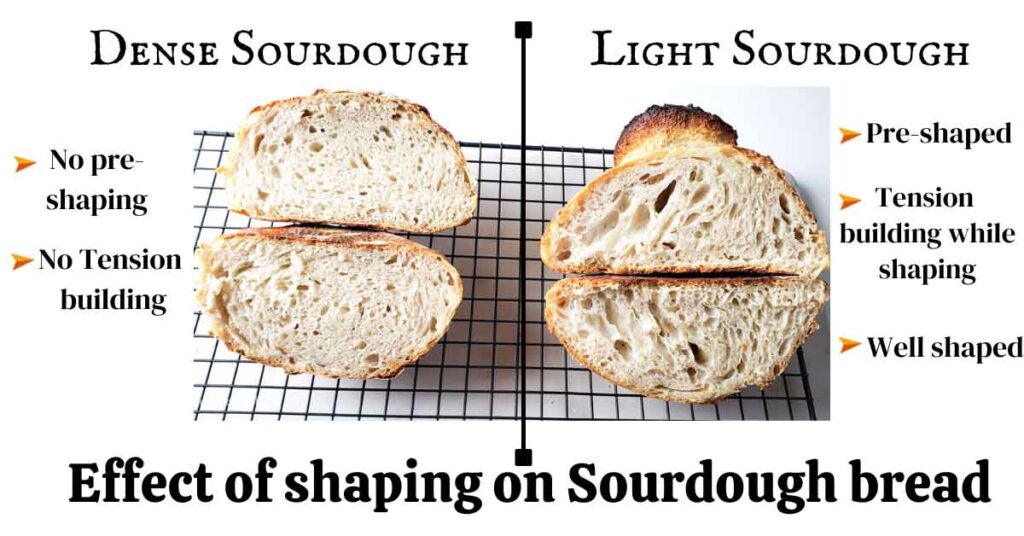
Credit: theflavorbells.com
Mastering The Yeast
To make homemade bread less dense, mastering yeast is vital. Yeast helps the dough rise, making it light and fluffy. Proper yeast handling ensures the best bread texture. Understand yeast activation and quantity for perfect bread.
Activating Yeast
Activating yeast is the first step in making fluffy bread. Use warm water, around 110°F, to activate the yeast. Cold water won’t work, and hot water kills yeast. Add a teaspoon of sugar to feed the yeast. Stir until dissolved.
Wait for 5-10 minutes. The mixture will become frothy. This means the yeast is active and ready to use. If there’s no froth, the yeast is dead. Start with fresh yeast.
Yeast Quantity
The right yeast quantity ensures proper dough rise. Too little yeast makes dense bread. Too much yeast affects taste and texture. A standard recipe uses 2 ¼ teaspoons of yeast for 3 cups of flour.
Adjust the yeast based on flour type. Whole grain flour needs more yeast. Use 3 teaspoons for 3 cups of whole grain flour. For white flour, stick to the standard amount.
Here’s a quick table for yeast quantities:
| Flour Type | Yeast Amount |
|---|---|
| White Flour | 2 ¼ tsp for 3 cups |
| Whole Grain Flour | 3 tsp for 3 cups |
Always measure yeast carefully. Use a measuring spoon for accuracy. This ensures your dough rises perfectly, giving you fluffy bread.
Perfecting The Dough
Perfecting the dough is key to making less dense homemade bread. This involves mastering a few techniques. Ensuring your dough is well-kneaded and properly hydrated is essential. Let’s dive into these aspects to create light, fluffy bread.
Kneading Techniques
Kneading is vital for gluten development. Gluten gives bread its structure and texture. Follow these steps for effective kneading:
- Start with clean hands: Wet your hands slightly to prevent sticking.
- Push and fold: Press the dough with your palms, then fold it over.
- Rotate the dough: Turn the dough 90 degrees and repeat the process.
- Continue kneading: Knead for 10-15 minutes until the dough is smooth.
Proper kneading ensures a well-developed gluten network. This helps the bread rise better and become airy.
Dough Hydration
Dough hydration is the ratio of water to flour. Higher hydration makes lighter bread. Here’s how to adjust hydration:
- Measure accurately: Use a kitchen scale for precise measurements.
- Follow a recipe: Stick to a trusted recipe for the best results.
- Add water gradually: Add water slowly and mix until the dough is sticky but not wet.
Here’s a simple hydration table for reference:
| Flour (grams) | Water (grams) | Hydration (%) |
|---|---|---|
| 500 | 325 | 65% |
| 500 | 375 | 75% |
Higher hydration levels create more steam during baking. This steam expands the dough and makes the bread lighter.
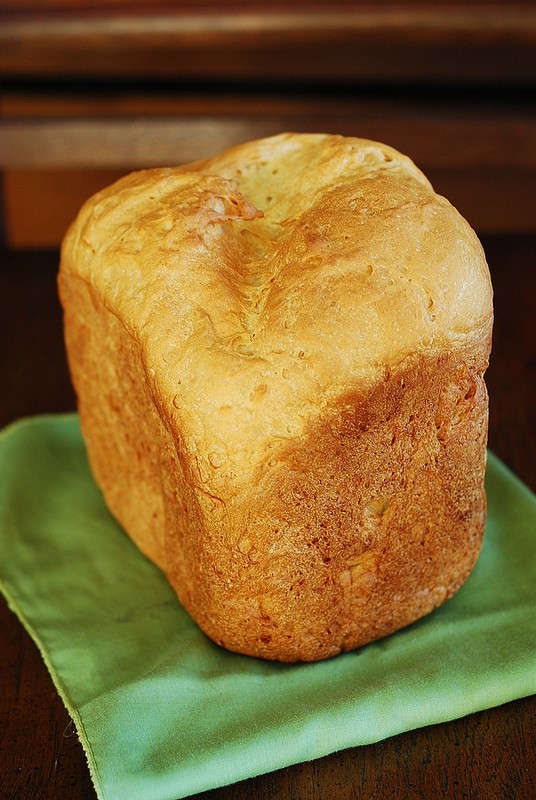
Credit: juliasalbum.com
Proofing Tips
Making homemade bread less dense can be a bit tricky. One of the key steps in achieving light and airy bread is proper proofing. Proofing allows the dough to rise, giving it the right texture. Here are some important proofing tips to help you make perfect bread.
Ideal Proofing Conditions
Creating the ideal environment for proofing is crucial. Yeast needs warmth and moisture to thrive. A warm kitchen is perfect for proofing dough. Aim for a temperature between 75°F and 85°F (24°C and 29°C). If your kitchen is too cold, use your oven as a proofing box. Preheat the oven to its lowest setting for a few minutes, then turn it off. Place a bowl of hot water inside to keep the air moist.
Cover the dough with a damp cloth or plastic wrap. This traps moisture and keeps the surface from drying out. A dry surface can create a crust, preventing proper rising. If you have a proofing drawer, that’s even better!
Proofing Duration
The duration of proofing affects the bread’s texture. The first proofing usually takes about 1 to 2 hours. The dough should double in size. If it doesn’t, give it more time. Pushing the dough too soon can result in dense bread.
After shaping the dough, it needs a second proofing. This step is shorter, around 30 to 60 minutes. The dough should rise again, but not double this time. Watch the dough closely. Over-proofing can make it collapse, leading to dense bread.
Use the poke test to check readiness. Gently poke the dough with your finger. If the indentation springs back slowly, it’s ready. If it doesn’t spring back, it needs more time. Simple but effective.
Baking Techniques
Baking Techniques play a crucial role in determining the texture of your homemade bread. By understanding and applying the right techniques, you can make your bread less dense and more enjoyable. Here, we explore key aspects of baking that can transform your loaf.
Oven Temperature
The temperature of your oven is critical for baking good bread. Always preheat your oven to ensure even baking. A high temperature at the start helps the bread rise quickly, giving it a light texture.
Consider baking at 450°F for the first 15 minutes. Then, lower the temperature to 400°F to finish baking. This method helps the bread to rise without becoming dense.
Steam Introduction
Introducing steam during the initial baking phase can significantly improve your bread’s texture. Steam keeps the crust soft, allowing the bread to expand fully.
Place a shallow pan of water at the bottom of the oven before you start baking. Alternatively, you can spritz water inside the oven using a spray bottle. This creates steam, which aids in achieving a light and airy loaf.
For best results, use one of these methods:
- Place ice cubes in a hot pan at the bottom of the oven.
- Use a spray bottle to mist the oven walls right after placing the bread inside.
| Technique | Effect |
|---|---|
| High Initial Temperature | Helps the bread rise quickly |
| Lower Temperature After 15 mins | Ensures even baking |
| Steam Introduction | Keeps the crust soft |
These baking techniques are simple but effective. Implementing them can make a noticeable difference in your homemade bread.
Frequently Asked Questions
How To Make Bread Less Dense?
Use proper yeast and let dough rise fully.
Why Is My Homemade Bread So Dense?
Dense bread can result from under-kneading or insufficient rising time.
What Ingredient Makes Bread Lighter?
Adding vital wheat gluten improves the bread’s texture, making it lighter.
Does Kneading Affect Bread Density?
Yes, kneading develops gluten, making bread less dense.
How Long Should Bread Dough Rise?
Bread dough should rise until doubled in size, usually 1-2 hours.
Can Too Much Flour Make Bread Dense?
Yes, too much flour makes bread heavy and dense.
Conclusion
Achieving light and airy homemade bread is possible with the right techniques. Use fresh yeast and proper kneading. Allow enough time for dough to rise. Avoid overworking the dough. Experiment with hydration levels. By following these tips, your bread will be less dense and more delicious.
Enjoy your baking journey!