
Measuring yeast accurately is key in bread making. Too much or too little can affect your bread’s rise and taste.
Bread making can be both an art and a science. One of the most crucial steps is measuring yeast correctly. The right amount ensures that your bread rises perfectly and has the best texture. Yeast acts like a magic ingredient, causing the dough to expand and become fluffy.
But how do you measure it correctly? Whether you’re a beginner or a seasoned baker, understanding this process is essential. This guide will walk you through the steps, ensuring your bread turns out great every time. Let’s dive into the details of measuring yeast for perfect bread making.
Importance Of Measuring Yeast
The importance of measuring yeast in bread making cannot be overstated. Yeast is a key ingredient that determines the texture, flavor, and rise of your bread. Accurate measurements ensure a perfect balance, leading to delicious and consistent results.
Role Of Yeast In Bread Making
Yeast is a living organism that helps bread rise. It feeds on sugars in the dough, producing carbon dioxide and alcohol. The carbon dioxide gets trapped in the dough, creating air bubbles. This process gives bread its light and airy texture. Without yeast, bread would be dense and flat.
Impact Of Incorrect Measurements
Using too much yeast can cause the bread to rise too quickly. This can result in large holes and a coarse texture. The bread may also have a yeasty flavor, which can be unpleasant. On the other hand, using too little yeast can lead to dense, heavy bread. The dough may not rise enough, resulting in a compact texture.
Accurate yeast measurements are crucial for consistent results. Always use a kitchen scale for precise measurements. This ensures that you achieve the desired texture and flavor every time you bake bread.
Types Of Yeast
Different types of yeast are used in bread making, including active dry yeast, instant yeast, and fresh yeast. Measuring yeast accurately ensures proper dough rise and texture. Use teaspoons or digital scales for precise measurements.
Hey friends, today we’re going to dive into the world of yeast for bread making. Understanding types of yeast is key to perfecting your bread. Different types of yeast can change the way your bread rises and tastes. Let’s look at the three main types: active dry yeast, instant yeast, and fresh yeast. ###Active Dry Yeast
Active dry yeast is like the reliable old friend you can always count on. It’s the most common type of yeast used in home baking. Why? Because it’s easy to use and store. Here’s what you need to know: – It comes in small granules. – It needs to be dissolved in warm water before use. – The water should be around 110°F (43°C). Pro tip: Always check the expiration date. Old yeast can lead to flat bread. No one wants that! ###Instant Yeast
Instant yeast is the speedy cousin of active dry yeast. It works fast and doesn’t need to be dissolved in water. You can mix it right into your dry ingredients. Benefits of instant yeast: – It saves time. No need to proof it. – It provides a quicker rise. Quick tip: Reduce the amount of instant yeast slightly if you’re converting from a recipe that uses active dry yeast. ###Fresh Yeast
Fresh yeast, also known as cake yeast, is like a secret weapon for professional bakers. It comes in small, cake-like blocks and needs to be refrigerated. Things to keep in mind: – It’s highly perishable. Use it quickly. – It needs to be crumbled and dissolved in water before use. – It offers a strong, consistent rise. Anecdote time: I recently tried fresh yeast for a holiday loaf. The results were amazing, but I had to work fast. Fresh yeast waits for no one! In summary, choosing the right yeast depends on your baking needs and schedule. Active dry yeast is great for beginners, instant yeast is perfect for a quick bake, and fresh yeast is ideal for special recipes that need a strong rise. Happy baking!Tools For Measuring Yeast
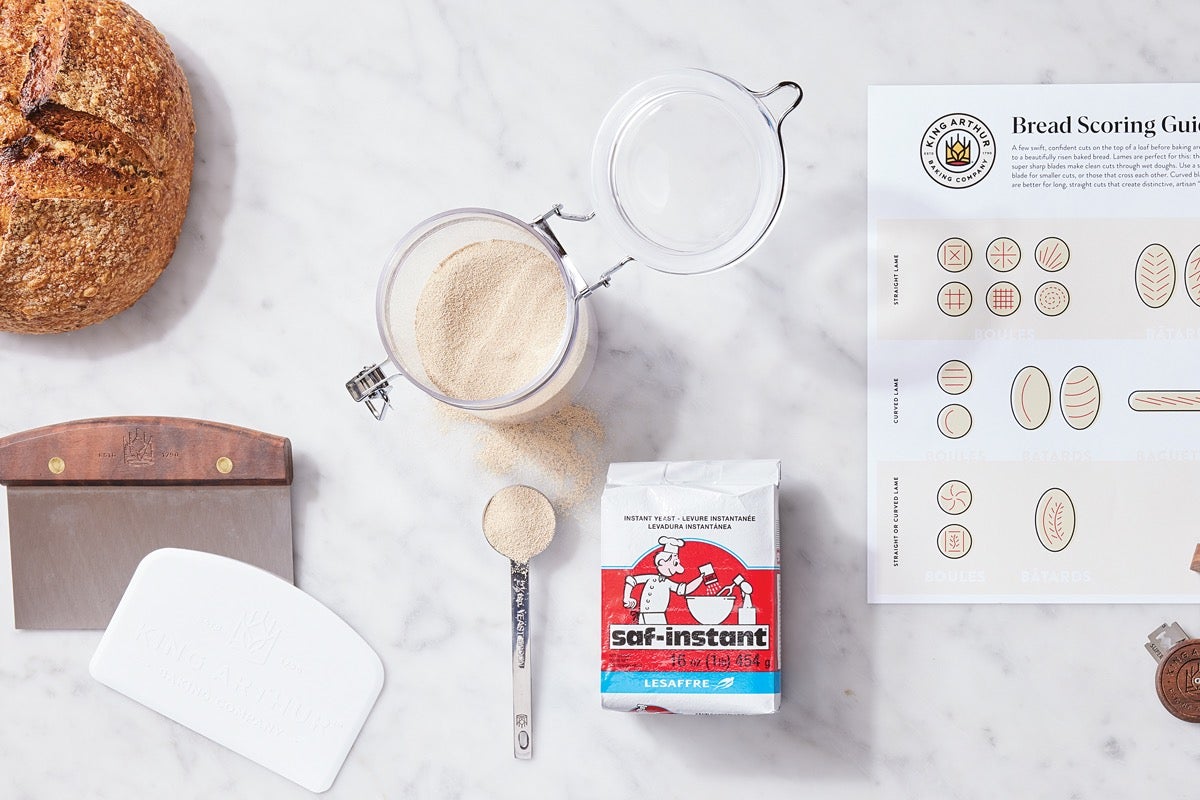
Hey friends, welcome back to our bread-making journey! Today, we’re diving into a crucial part of the process: measuring yeast. Getting the right amount of yeast is like adding the perfect amount of salt to your favorite dish. Too little, and your bread won’t rise. Too much, and you might end up with a bubbly mess. Let’s talk about the tools you’ll need to measure yeast accurately.
Measuring Spoons
Measuring spoons are a simple and handy tool for measuring yeast. They’re great for beginners and anyone who likes to keep things straightforward.
- Easy to Use: Just scoop and level off.
- Affordable: You can find them in most stores.
- Sizes: Typically come in 1/4 tsp, 1/2 tsp, 1 tsp, and 1 tbsp.
Pro Tip: Make sure to use dry measuring spoons. Wet ones can cause the yeast to stick and give you an inaccurate measure.
Digital Scales
For those who want to be precise, digital scales are the way to go. I used to eyeball my yeast measurements. Then I got a digital scale. What a difference!
- Accuracy: Measures yeast down to the gram.
- Consistency: Helps you replicate the perfect loaf every time.
- Versatility: Can be used for other baking ingredients too.
Using a digital scale is simple:
- Turn on the scale and set it to grams.
- Place a small bowl on the scale and zero it out.
- Add yeast until you reach the desired weight.
Remember, a little precision goes a long way in baking. Happy measuring!
:max_bytes(150000):strip_icc()/27023-best-basic-sweet-bread-mfs-4-88a60bdae83b4388bee30ef95cb35e7e.jpg)
Credit: www.allrecipes.com
Techniques For Accurate Measurement
Measuring yeast accurately is crucial for perfect bread. Incorrect amounts can affect the rise and texture. Two common techniques ensure precision. These methods are easy and reliable.
Spoon And Level Method
Use a spoon to scoop the yeast from its container. Fill the spoon heaping full. Then, use a knife to level it off. This method gives consistent yeast amounts each time. It’s simple and effective for home bakers.
Weighing Yeast
Weighing yeast provides the most accurate measurement. Use a kitchen scale for this method. Place a small bowl on the scale. Press the tare button to zero out the weight. Add yeast until you reach the desired amount. This technique ensures precision, especially for professional bakers.
Adjusting Yeast For Different Recipes
Adjusting yeast for different recipes can seem tricky. It’s essential to get it right. The amount of yeast affects the dough’s rise and texture. Different recipes call for varying yeast amounts. Let’s explore how to adjust yeast for different baking needs.
High-sugar Doughs
High-sugar doughs require more yeast. Sugar can slow down yeast activity. The yeast needs to work harder. Add extra yeast to ensure proper rising. This is crucial for sweet breads like brioche. Aim for 1.5 to 2 times the usual amount.
Low-temperature Baking
Low-temperature baking needs less yeast. Cooler temperatures slow yeast fermentation. Use about half the usual amount. This prevents over-proofing. Ideal for slow-rise recipes. Ensures a perfect texture and flavor.
Credit: www.kingarthurbaking.com
Common Mistakes To Avoid
Measuring yeast for bread making might sound simple, but it’s easy to make mistakes. And these mistakes can really mess up your bread. Let’s look at some common mistakes to avoid. Trust me, once you know these, your bread will turn out much better.
Over-measuring
One common mistake is using too much yeast. Adding extra yeast might seem like a way to make your bread rise faster. But, it can actually cause problems. Here’s why:
- Too much yeast can make your bread taste strange. It might end up with a strong, yeasty flavor.
- Fast rising can cause the bread to collapse. Imagine blowing up a balloon too quickly – it can pop!
- Texture issues. Your bread could become too crumbly or dense. Not what you want in a good loaf of bread.
So, always stick to the recipe. If it says one teaspoon of yeast, don’t add more. Your bread will thank you!
Under-measuring
On the flip side, not using enough yeast can also cause problems. Here’s what happens when you under-measure:
- Slow rising. Your dough might take forever to rise, which can be frustrating.
- Dense bread. Without enough yeast, your bread can turn out heavy and dense. Not the fluffy loaf you were hoping for.
- Poor flavor. The yeast helps develop the flavor of the bread. Too little yeast means less flavor.
Again, follow the recipe. If it calls for a specific amount of yeast, use that amount. It’s all about balance.
When I first started making bread, I thought I could just eyeball the yeast. Big mistake! My bread never turned out right. Once I started measuring correctly, everything changed. The good news? Measuring yeast doesn’t have to be hard. Just use a teaspoon or a digital scale. Simple tools can make a big difference.
Remember, making bread is like a science experiment. Follow the instructions, and you’ll get great results. Avoid these common mistakes, and your bread will be amazing. Happy baking!
Storing Yeast Properly
Storing yeast properly ensures your bread rises beautifully every time. Proper storage keeps yeast alive and active, which is crucial for the bread-making process. Let’s explore the best ways to store yeast so that it remains effective for your baking needs.
Ideal Storage Conditions
Store yeast in a cool, dry place. Keep it away from direct sunlight. The ideal temperature is between 33°F and 45°F. A refrigerator is a great place to store yeast. Always seal the yeast in an airtight container. This prevents moisture from getting in.
Shelf Life Of Different Yeast Types
Active dry yeast lasts up to 6 months in the fridge. Instant yeast can last up to 2 years if unopened. Fresh yeast, also known as cake yeast, has a shorter shelf life. It typically lasts about 2 weeks in the refrigerator. Always check the expiration date on the package. This ensures the yeast is still good to use.
:max_bytes(150000):strip_icc()/baking-yeast-dry-and-fresh-yeast-measurements-1446706_color-c271c31dcdc041de80537a2c1a1664a5.png)
Credit: www.thespruceeats.com
Expert Tips For Consistent Results
Hey friends, today we’re diving into a crucial aspect of bread making: measuring yeast. Getting it right can be the difference between a fluffy loaf and a dense brick. So, let’s talk about some expert tips for consistent results that will help you master this step. Trust me, it’s not as hard as it sounds!
Maintaining Yeast Activity
First things first, yeast is a living organism. It’s like a little pet that helps your bread rise. But, like any pet, it needs the right conditions to stay active. Here’s how you can keep your yeast happy:
- Store it properly: Keep your yeast in a cool, dry place. If you’ve opened the package, it’s best to store it in the fridge.
- Check the temperature: When mixing yeast with water, the water should be warm but not hot. Around 110°F (43°C) is perfect. Too hot, and you’ll kill the yeast. Too cold, and it won’t activate.
Imagine it like this: If you were a yeast, would you rather be in a cozy, warm bath or a scorching hot tub? Exactly.
Testing Yeast Freshness
Old yeast can be a disaster for your bread. But how do you know if your yeast is still good to use? Here’s a simple test you can do:
- Mix: Combine 1 teaspoon of sugar with 1/2 cup of warm water (110°F or 43°C).
- Add yeast: Sprinkle 2 1/4 teaspoons of yeast (one packet) into the water and stir gently.
- Wait: Let it sit for 10 minutes.
If your yeast is still active, it will start to foam and bubble. If nothing happens, it’s time to get new yeast. Think of it like this: If your car doesn’t start after turning the key, it’s not going anywhere. Same goes for your yeast.
So there you have it, friends. A couple of simple steps to ensure your yeast is always ready to do its job. Bread making might seem tricky, but with these tips, you’ll be well on your way to baking like a pro. Happy baking!
Frequently Asked Questions
How Do I Know How Much Yeast To Use In Bread?
Use 2 1/4 teaspoons of yeast for every 4 cups of flour. Adjust based on the recipe.
How To Accurately Measure Yeast?
Use a kitchen scale for the most accurate measurement of yeast. Weigh the required amount in grams. For small quantities, use a teaspoon, with one teaspoon roughly equal to 3 grams.
How Much Dry Yeast Is 1 Tsp?
1 teaspoon of dry yeast is approximately 0. 14 ounces or 4 grams. This is equivalent to a standard yeast packet.
How Much Yeast Do I Need For 2 Cups Of Flour For Bread?
Use 1 teaspoon of yeast for 2 cups of flour when making bread. Adjust based on recipe specifics.
Conclusion
Accurate yeast measurement ensures perfect bread every time. Use a kitchen scale for precision. Too much yeast can spoil the dough. Too little, and your bread may not rise. Practice makes perfect. Always follow the recipe. Remember, fresh yeast gives the best results.
Consistency is key. Happy baking!

Rakib Sarwar is a seasoned professional blogger, writer, and digital marketer with over 12 years of experience in freelance writing and niche website development on Upwork. In addition to his expertise in content creation and online marketing, Rakib is a registered pharmacist. Currently, he works in the IT Division of Sonali Bank PLC, where he combines his diverse skill set to excel in his career.