
Using a kitchen thermometer ensures your meat is cooked perfectly. It helps you avoid undercooked or overcooked meals.
Cooking meat to the right temperature is crucial for both flavor and safety. A kitchen thermometer is a valuable tool that takes the guesswork out of cooking. It can help you serve juicy steaks, tender chicken, and perfectly roasted pork.
But many people are unsure how to use one properly. In this guide, we will explain how to use a kitchen thermometer effectively. You will learn the correct steps and tips to ensure your meat is always delicious and safe to eat. Let’s dive in and make your cooking experience easier and more enjoyable.
:max_bytes(150000):strip_icc()/__opt__aboutcom__coeus__resources__content_migration__serious_eats__seriouseats.com__images__2016__10__20161008-meat-temp-5-e10885b8363b44bf825df1d9ae43a702.jpg)
Credit: www.seriouseats.com
Choosing The Right Thermometer
Choosing the right thermometer for your kitchen can be a game-changer in your cooking. It ensures that your meat is cooked to perfection every time. But with so many options out there, how do you know which one is right for you? Let’s break it down step by step, starting with the basics.
Digital Vs. Analog
When it comes to thermometers, you have two main types: digital and analog. Think of it like choosing between a digital watch and an old-school clock.
- Digital Thermometers: These are modern and easy to read. They give you an accurate temperature quickly. No guessing involved. You just look at the screen.
- Analog Thermometers: These are the classic ones with a dial. They might take a bit longer to read, but they don’t need batteries. Some people prefer their simplicity.
Instant-read Vs. Leave-in
Next, let’s talk about how you use these thermometers. There are two main ways: instant-read and leave-in. Imagine you’re baking a cake. Do you want to check it quickly, or keep an eye on it the whole time?
- Instant-Read Thermometers: These are perfect for a quick check. You stick it in the meat, get your reading in a few seconds, and then take it out. It’s like peeking into the oven to see if your cake is done.
- Leave-In Thermometers: These stay in the meat while it cooks. You can monitor the temperature without opening the oven. It’s like having a window to check your cake without letting the heat out.
Choosing the right thermometer isn’t complicated. It just depends on what you need. If you want quick and easy, go digital and instant-read. If you prefer to monitor constantly, an analog leave-in might be your best friend.
Personal Tip: I recently tried a digital instant-read thermometer for a BBQ. It was a lifesaver! I knew exactly when my steaks were perfectly medium-rare without any guesswork.
So, next time you’re cooking meat, remember these tips. A good thermometer can make your meals delicious and safe. Happy cooking!
Calibrating Your Thermometer
Hey friends, today we’re diving into something super useful for your kitchen adventures: calibrating your kitchen thermometer. It’s a simple step that ensures your thermometer is giving you the right temperature. And the good news? It’s easier than you think. Let’s break it down with a couple of methods you can try at home.
Ice Water Method
This method is quick and easy. It’s like testing your thermometer with a cold drink. Here’s how you can do it:
- Fill a glass with ice cubes.
- Add cold water to the brim.
- Stir it and let it sit for about three minutes.
- Insert your thermometer into the water. Make sure it doesn’t touch the sides or bottom of the glass.
- Wait for the reading to stabilize. It should read 32°F (0°C).
If it’s off, you may need to adjust it. Check your thermometer’s manual for instructions on how to do this.
Boiling Water Method
Prefer something hot? The boiling water method is just as simple. It’s like making a cup of tea:
- Boil a pot of water.
- Once it’s boiling, insert your thermometer. Again, avoid touching the sides or bottom of the pot.
- Wait for the reading to stabilize. It should read 212°F (100°C), assuming you’re at sea level.
If the reading is off, again, check your manual to calibrate it.
So, there you have it. Two easy ways to make sure your kitchen thermometer is ready to give you accurate readings. Trust me, it’s worth the few minutes it takes. You’ll know exactly when your meat is perfectly cooked. Happy cooking!
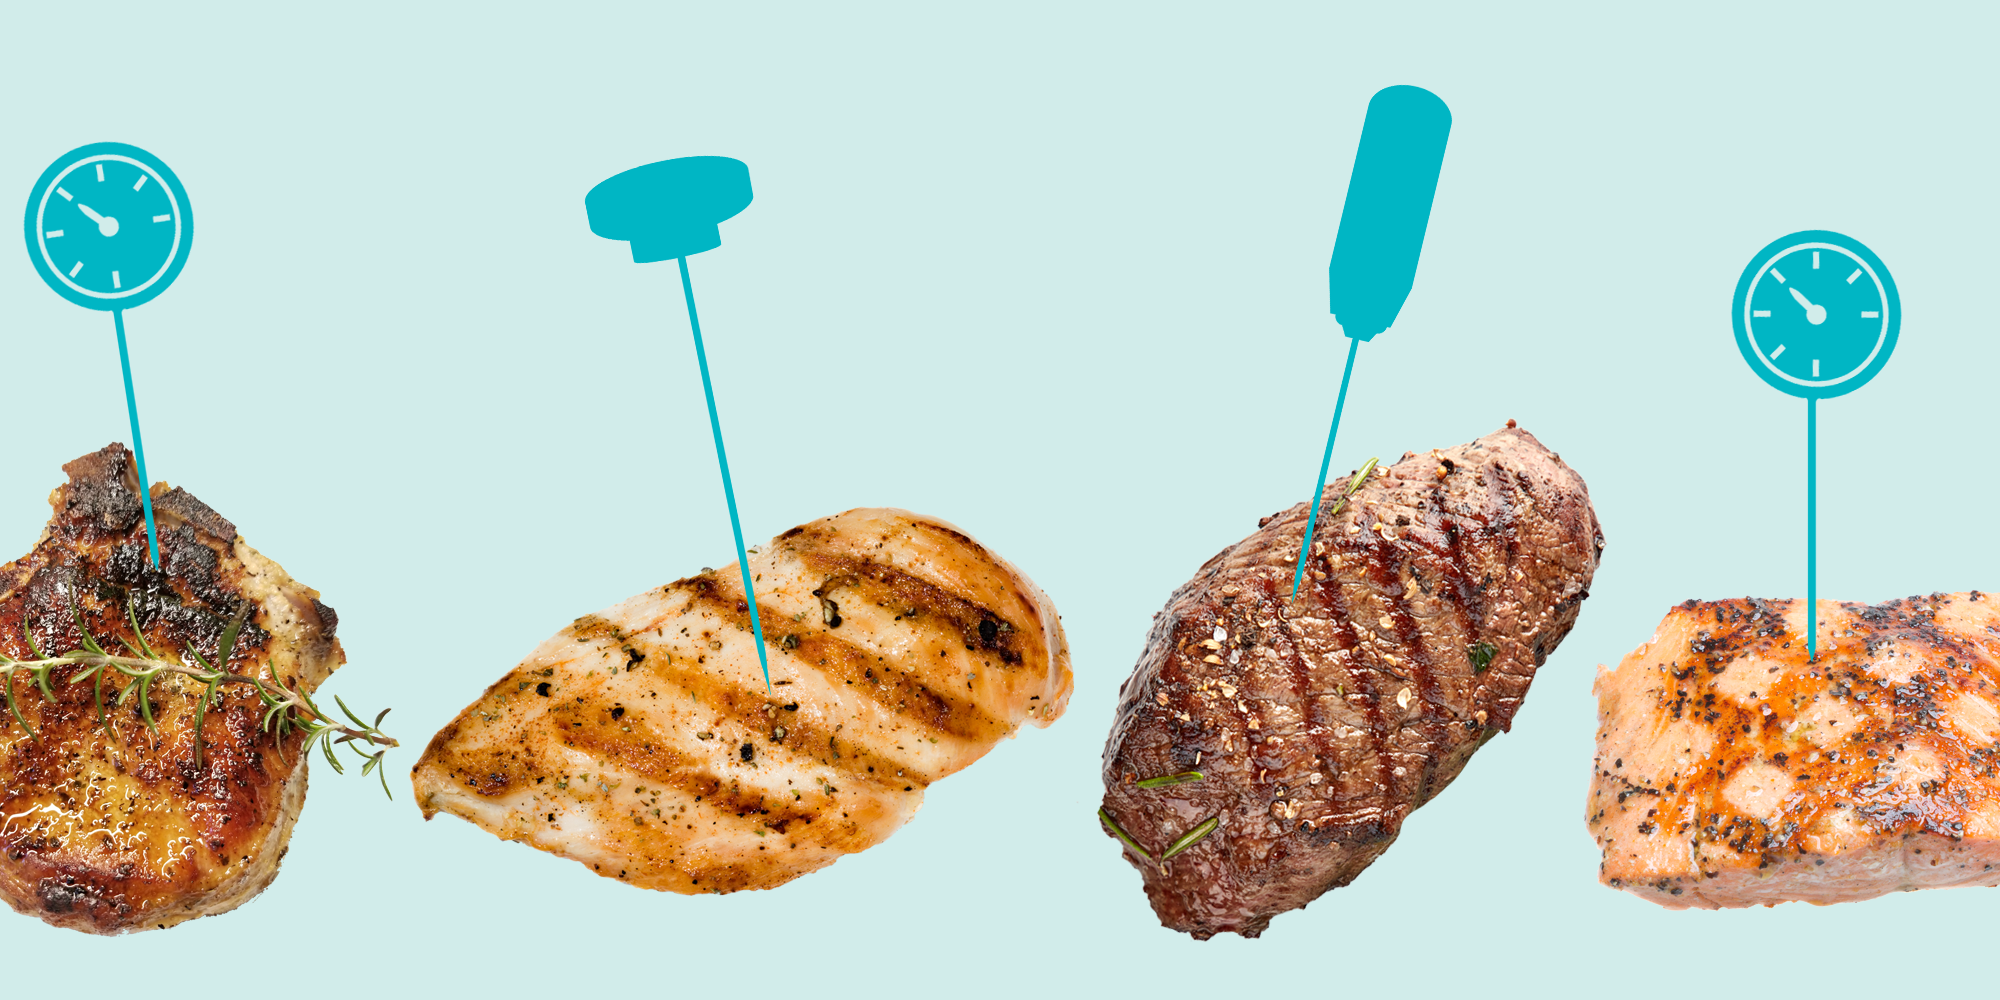
Proper Placement In Meat
Using a kitchen thermometer correctly ensures your meat is cooked safely. Correct placement of the thermometer is essential. It helps you get accurate readings. Here’s how to place the thermometer properly in the meat.
Finding The Thickest Part
Insert the thermometer into the thickest part of the meat. This is usually the center. It cooks the slowest. Check the thickest part to ensure the entire piece is done. If the center is cooked, the rest is likely safe too.
Avoiding Bone And Fat
Do not touch bone with the thermometer. Bones conduct heat. This gives a false high reading. Avoid fat as well. Fat heats up faster than lean meat. This also leads to inaccurate readings.
Checking Temperature For Different Meats
Hey friends, today we are going to dive into how to use a kitchen thermometer to check the temperature of different meats. This is super important because cooking meat to the right temperature ensures it is safe to eat and tastes great. Different meats have different temperature requirements. Let’s break it down for beef and lamb, poultry, and pork.
Beef And Lamb
When cooking beef and lamb, the internal temperature varies based on your preference for doneness. Here are some common temperature targets:
- Rare: 125°F (52°C)
- Medium Rare: 135°F (57°C)
- Medium: 145°F (63°C)
- Well Done: 160°F (71°C) and above
To measure the temperature, insert the thermometer into the thickest part of the meat, avoiding bone and fat. Wait for a few seconds until the temperature stabilizes. I recently asked my friend John, who is a chef, about his tip for perfect steak. He said, “Always let the meat rest after cooking. This helps the juices redistribute, making it more tender.”
Poultry And Pork
Poultry and pork have specific temperature requirements to ensure they are safe to eat. Here’s what you need to know:
- Chicken and Turkey: Cook to at least 165°F (74°C)
- Pork: Cook to at least 145°F (63°C)
For chicken and turkey, make sure to check the temperature in the thickest part of the breast or thigh. For pork, insert the thermometer into the center of the thickest part of the cut. I remember once undercooking chicken and learning the hard way that it’s better to be safe than sorry. Always double-check!
Using a kitchen thermometer might seem like an extra step, but it’s worth it. It ensures your meat is cooked properly, keeping you and your loved ones safe. So next time you’re in the kitchen, grab that thermometer and cook with confidence!
Achieving Desired Doneness
Hey friends, today I’ll show you how to use a kitchen thermometer to cook meat just the way you like it. It’s all about hitting that perfect temperature. Whether you want your meat rare, medium, or well-done, a kitchen thermometer is your best friend. Let’s dive into the details of achieving the perfect doneness.
Rare
Do you like your steak nice and pink inside? Then you want it rare. Here’s how to do it:
- Insert the thermometer into the thickest part of the meat.
- Look for a temperature of 120-130°F (49-54°C).
- Remove the meat from heat once it hits this range.
The good news? It’s easy to remember. When the thermometer reads 120-130°F, you’re good to go!
Medium
Not too pink, but still juicy? Medium is what you’re after. Here’s how:
- Place the thermometer in the thickest part of the meat, avoiding bones or fat.
- Look for a temperature of 140-150°F (60-66°C).
- Remove the meat from heat when it reaches this range.
Medium gives you a nice balance. It’s neither too raw nor too cooked.
Well-done
Prefer your meat fully cooked? Then well-done is your choice. Here’s what to do:
- Insert the thermometer into the thickest part of the meat.
- Look for a temperature of 160°F (71°C) or higher.
- Remove the meat from heat once it reaches this temperature.
Well-done meat is cooked all the way through. No pink inside. Perfect if you like it that way.
Resting Meat After Cooking
Now, let’s talk about a crucial step: resting the meat. After cooking, let your meat rest for a few minutes before cutting into it. Why? Because:
- It allows the juices to redistribute.
- Your meat will be juicier and more flavorful.
- It’s easier to slice and serve.
Trust me, this step makes a big difference. I always let my meat rest for 5-10 minutes. It’s worth the wait!
So, there you have it. Using a kitchen thermometer is simple and effective. Follow these tips, and you’ll achieve the perfect doneness every time. Happy cooking!
Cleaning And Storing Your Thermometer
To ensure your kitchen thermometer remains accurate and safe, proper cleaning and storage are crucial. A clean thermometer prevents cross-contamination and ensures your food stays safe. Here’s how to sanitize and store your thermometer effectively.
Sanitizing Tips
Always clean your thermometer before and after use. Use hot, soapy water to wash the probe. Rinse it thoroughly under running water. Dry the thermometer with a clean paper towel. For extra safety, use an alcohol wipe to sanitize the probe. Let the alcohol dry completely before using the thermometer again. Avoid submerging the entire thermometer in water. This can damage its electronic parts.
Proper Storage
Store your thermometer in a clean, dry place. Use a protective case if available. This keeps the probe from getting dirty or damaged. Avoid storing the thermometer near heat sources. Heat can affect its accuracy. Keep it away from sharp objects that might scratch the probe. A kitchen drawer or cupboard is ideal for storage.
Regularly check the thermometer for any signs of damage. Replace it if you notice any cracks or faults. Proper care will extend the life of your kitchen thermometer.
Common Mistakes To Avoid
Hey friends, today we’re talking about common mistakes you might make when using a kitchen thermometer for meat. Trust me, these errors can mess up your cooking. And nobody wants that! So, let’s get started and make sure you know how to avoid these pitfalls.
Not Calibrating Regularly
First up, calibration. It’s a big word but a simple idea. If your thermometer isn’t calibrated, it won’t give you the right temperature. And that means your meat could be undercooked or overcooked. Neither is good.
So, how do you calibrate? It’s easy:
- Fill a glass with ice and water.
- Put the thermometer in the glass.
- Wait about 30 seconds.
- Check the reading. It should be 32°F (0°C).
If it’s not 32°F, you need to adjust your thermometer. Most thermometers have a little screw or button for this. Check the manual if you’re unsure.
The takeaway? Calibrate your thermometer at least once a month. Your taste buds will thank you!
Using Incorrect Placement
Next, let’s talk about where you’re placing the thermometer. This is super important. If you stick it in the wrong spot, you won’t get an accurate reading. And that could lead to food that isn’t safe to eat.
Here’s a quick guide:
| Type of Meat | Correct Placement |
|---|---|
| Chicken | Thickest part of the breast, avoiding bone |
| Beef/Pork Roast | Center of the thickest part |
| Steak | Center of the steak |
Quick tip: Always avoid bone and fat. They can give you false readings.
The bottom line? Proper placement ensures your meat is cooked just right. No guessing, just delicious results.
Now that you know these common mistakes, you’re ready to cook like a pro. Happy cooking!
:max_bytes(150000):strip_icc()/GettyImages-874776038-5aac25d33de423003618328a.jpg)
Credit: www.thespruceeats.com
Benefits Of Using A Kitchen Thermometer
Hey friends, ever wondered why your roast chicken isn’t as juicy as you’d like? Or why your steak sometimes turns out dry? The secret might just be a kitchen thermometer. Let’s dive into the benefits of using a kitchen thermometer to cook meat perfectly every time!
Ensuring Food Safety
First things first: safety. Using a kitchen thermometer helps you cook meat to the right temperature. This kills harmful bacteria. No one wants food poisoning, right?
Here are some key points:
- Proper Cooking: A thermometer ensures you cook meat to the safe internal temperature.
- Avoiding Overcooking: It helps you avoid overcooking, which can make the meat dry.
I remember once serving undercooked chicken at a family barbecue. It was embarrassing. Now, I never skip checking with my kitchen thermometer.
Enhancing Flavor And Texture
Next up, flavor and texture. A kitchen thermometer isn’t just about safety. It ensures your meat is cooked just right. Imagine biting into a perfectly juicy steak. That’s what a thermometer can help you achieve.
Consider these benefits:
- Perfect Doneness: You get to cook meat to your preferred doneness, be it rare, medium, or well-done.
- Consistency: It provides consistent results every time you cook.
Think of it like this: A kitchen thermometer is like a GPS for cooking meat. It guides you to the perfect endpoint, ensuring your meal is a hit every time.
Credit: www.goodhousekeeping.com
Frequently Asked Questions
How Do You Use A Meat Thermometer Correctly?
Insert the thermometer into the thickest part of the meat. Avoid bones and fat. Check the temperature while cooking. Follow recommended temperature guidelines. Clean the thermometer after use.
How Do You Use A Thermometer To Check The Doneness Of Meat?
Insert the thermometer into the thickest part of the meat. Avoid bones, fat, and gristle. Check the temperature against the recommended doneness levels. Clean the thermometer after use.
Do You Leave Meat Thermometer In While Cooking?
Yes, you can leave a meat thermometer in while cooking. Ensure it’s oven-safe and placed correctly in the meat.
Is A Kitchen Thermometer The Same As A Meat Thermometer?
No, a kitchen thermometer and a meat thermometer are not the same. A kitchen thermometer measures various food temperatures, while a meat thermometer is specifically for meat.
Conclusion
Using a kitchen thermometer ensures perfectly cooked meat every time. It prevents undercooking or overcooking. Check the temperature at the thickest part. Clean the thermometer after each use. This simple tool makes cooking safer and tastier. Give it a try for better meals.
Practice makes perfect. Happy cooking!

Rakib Sarwar is a seasoned professional blogger, writer, and digital marketer with over 12 years of experience in freelance writing and niche website development on Upwork. In addition to his expertise in content creation and online marketing, Rakib is a registered pharmacist. Currently, he works in the IT Division of Sonali Bank PLC, where he combines his diverse skill set to excel in his career.