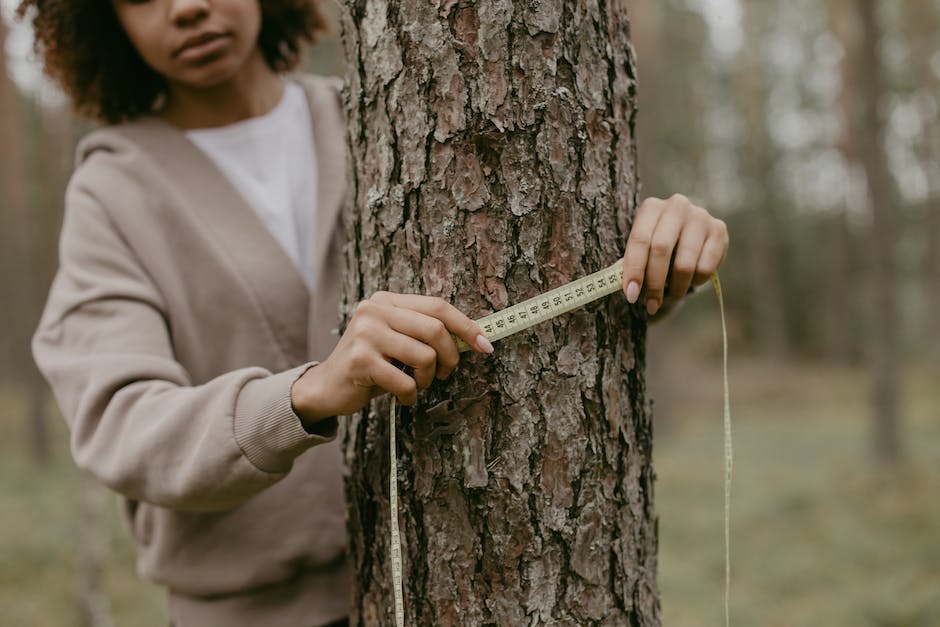
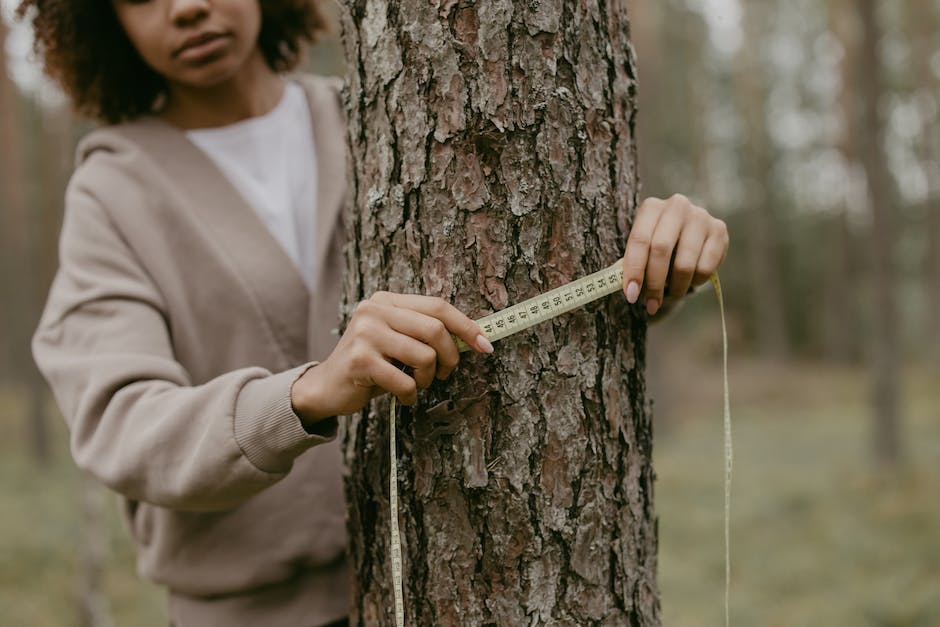
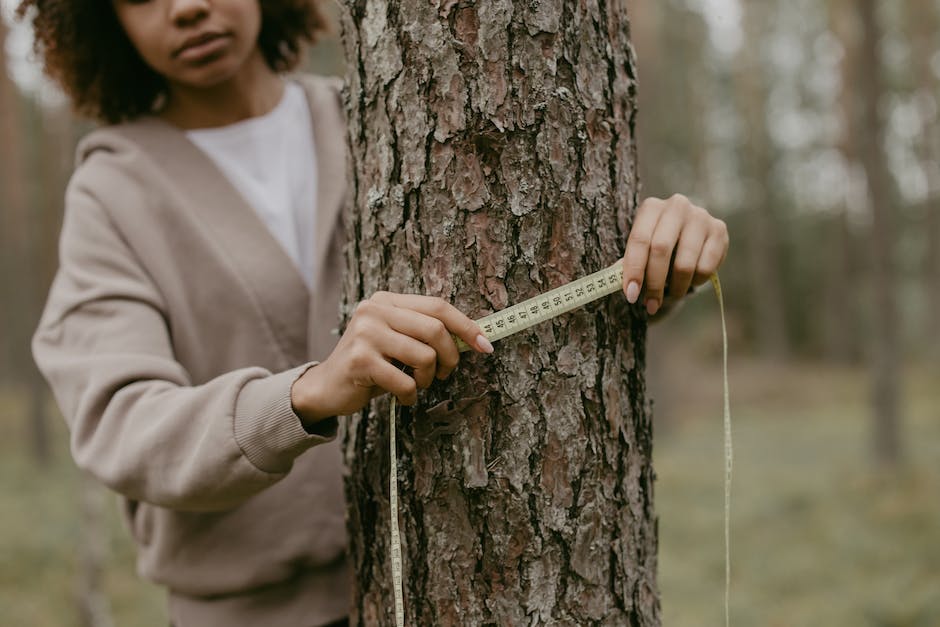
As we delve into the world of trees, understanding their physical attributes such as the girth becomes crucial. Tree girth measurement, a basic yet essential skill, plays a significant role in forestry, botany, and ecology, yielding valuable data for research as well as practical functions – like timber yield estimation. This process is not as simple as wrapping a tape around the trunk. It requires precision, the right tools, and an understanding of different species. Moreover, since trees are as diverse as nature itself, measuring irregularly shaped trees adds another layer to the complexity. In the following sections, we’ll be supporting your journey into mastering tree girth measurement, equipped with practical techniques and an understanding of how to interpret these measurements in various contexts.
Basics of Tree Girth Measurement
Introduction: The Art and Importance of Tree Girth Measurement
Measuring the girth of a tree is a straightforward process, yet it plays a crucial role in understanding the tree’s growth, overall health, and the biodiversity of an area. It is a diagnostic tool for arborists, a fascinating metric for naturalists, and an essential task for environmentalists studying the impacts of climate change on forests. This learning guide provides the basics of tree girth measurement, its importance, and the tools needed for efficient and accurate measurement.
The Process of Measuring Tree Girth
The measure of a tree’s girth, also known as its circumference, is typically taken at a standard height of 4.5 feet (or 1.37 meters) above the ground. This measurement is universally recognized and often referred to as diameter breast height (DBH). Trees come in varying shapes and sizes; consequently, it is vital to learn the correct technique for the utmost accuracy.
- Start by locating the measurement’s height on the tree. This is ordinarily 4.5 feet or 1.37 meters above the ground. For sloped grounds, measure from the uphill side.
- Following that, wrap the measuring tape around the tree at the marked height. Ensure the tape is straight and levelled for an accurate measurement.
- Note down the measurement where the “0” end of the tape meets the remaining length.
- If the tree has a significant lean, measure the girth at a right angle to the axis of the tree, aligning with its center of gravity.
- For multi-stemmed trees, each stem’s girth should be measured at the standard height above the ground.
The Significance of Tree Girth Measurement
Tree girth measurements provide crucial insights into the overall health and progress of a tree. Regular measurement can help detect any sudden changes in growth, indicating possible health issues. On a more extensive scale, girth measurements support studies on forest health and biodiversity.
Researchers use long-term records of tree girth to understand how different species respond to environmental changes. By identifying and understanding these patterns, scientists can make more accurate predictions about the future health of our forests and the impacts of climate change.
Appropriate Tools for Measuring Tree Girth
While the process may sound simple, using the right tools can make a significant difference in the accuracy of your measurements. For minimal equipment, a flexible measuring tape will suffice. However, for precision, forestry professionals recommend a diameter tape, often referred to as a D-tape. This specialized tape measures the diameter of the tree directly, eliminating potential errors in converting circumference measurements to diameter.
Conclusion
Learning how to measure a tree’s girth is not just about the numbers. It provides an opportunity to connect with nature while contributing valuable data for science and conservation. It may take some practice initially, but with the right tools and techniques, you’ll soon be able to carry out the task proficiently and confidently. The future health of our forests depends on attentive observation, and tree girth measurement stands as a significant part of that process.

Practical Measurement Techniques
Introduction: The Importance of Measuring Tree Girth
The measurement of a tree’s girth is a crucial practice that enables us to understand the health, growth, and age of a tree. While this might seem like a complicated task reserved for experienced arborists, you’d be surprised how straightforward it can be. With the right tools and technique, anyone from a gardening enthusiast to a seasoned forester can get an accurate measurement of tree girth.
Tools You Need for Measuring Tree Girth
- Tape Measure or Diameter Tape: A flexible, non-stretchable tape measure is ideal for this task. If you have a Diameter Tape, also known as D-tape, which is specifically designed for measuring the diameter of round objects like tree trunks, it would be the best tool.
- Notebook: To record your measurements.
- Pen or Pencil: For recording the girth.
Steps for Measuring Tree Girth
Step 1 – Identify the Correct Measurement Height
One critical aspect to remember is that the tree girth should always be measured at 4.5 feet (or 54 inches) above ground for standardization and comparison purposes. This height is often referred to as Diameter at Breast Height (DBH) in forestry terms. However, the tree’s base may slope or have irregularities, which might affect your measurement. In such cases, measure the tree girth from the higher side of the slope to get an accurate reading.
Step 2 – Position Your Tape Measure
Wrap the tape measure or the Diameter tape around the tree trunk at the identified height. The tape should be wrapped horizontally, featuring a 90-degree angle with the trunk’s vertical line. It should neither be too tight (as to press into the bark) nor too loose.
Step 3 – Reading the Measurement
On a regular tape measure, record the full circumference of the tree to the nearest tenth of an inch. If you use a Diameter tape, it gives you the diameter of the tree directly. However, to convert this to girth or circumference, you would need to multiply the diameter by pi (approximately 3.14159).
Step 4 – Document Your Measurements
Last but not least, write down your measurement in your notebook promptly. This step will help you compare the measurements over time.
Special Considerations for Different Tree Species
Remember, all trees are not created equally. The point of measurement might vary if the tree has a burl, branch, or abnormal swelling at 4.5 feet. In such situation, measure below or above the 4.5 feet mark. For multi-stemmed trees, each stem should be measured separately if they are over 5 inches in diameter.

Photo by aaronburden on Unsplash
Measuring Irregular Shaped Trees
Understanding Tree Girth Measurement
Tree girth is an important factor in forestry for determining the age and health of a tree, and in some cases, even for the purpose of obtaining timber volume. To measure girth, you need to measure around the trunk of the tree at a standard height, conventionally at breast height (4.5 feet from the ground). This value can be turned into diameter by dividing by Pi (~3.14). However, for irregular shaped trees or those with split trunks, the process may not be as straightforward.
Challenges with Measuring Irregular Shaped Trees
- Contoured trunks that are not round can cause issues with girth measurement.
- The point at which to measure the girth can be ambiguous for trees with enlarged trunk bases or burl formations.
- Multiple trunks or forks can complicate the measurement process.
Solutions: Methods to Measure Irregular Shaped Trees
While there exist complicated methods using complex geometry, let’s review a few simpler ones that are more accessible to someone without specialized forestry equipment or training.
- String and Measurement Approach: Take a string and wrap it around the widest point of the irregular trunk, marking where the string meets. Lay that string out against a ruler or tape measure to determine the circumference. This method works well for mildly irregular trees but may present issues for trees with a high degree of irregularity in their shape.
- Ruler and Compass Method: In this method, you begin by placing a ruler against the trunk of the tree, oriented vertically. Then, using a compass, draw arcs from three different points along the ruler’s length. The points where the arcs intersect will form a triangle, which can be used to calculate the tree’s diameter. This method is more complicated, but gives a more accurate estimation for particularly irregular trees.
- Multiple Trunks/Forks: For trees with multiple trunks split from the base, measure each trunk individually at the standard height (4.5 feet from the ground). Then add these numbers together. If a tree forks above the standard height, measure the trunk below the fork.
Key Points to Remember
- For the most accurate measurements, it is best to take several measurements at different points along the trunk and average them.
- When measuring non-circular trunks, measure the smallest diameter and the largest diameter, then average the two measurements.
- If more accuracy is needed due to the tree’s commercial or scientific significance, consider consulting with a professional forester or arborist.
Through this guidance, irregularly shaped trees should no longer pose a significant difficulty when it comes to measuring their girth. Remember, it’s better to estimate on the side of caution and underestimate rather than overestimate if uncertain.

Reading and Interpreting Measurements
Introduction: Who said trees can’t talk? They sure communicate through their girth!
Tree girth, which is the measurement around the trunk of the tree, can provide useful insights about the tree’s age, health, and growth pattern. But getting the right readings and interpreting them accurately requires the understanding of certain techniques. In this guide, we’ll spell out the process step by step.
Step One: The Preparation Stage
Before you begin, gather the equipment you’ll need. This includes a flexible measuring tape, a notepad, and a pen. The measuring tape should be flexible enough to go around the tree without slipping or falling, yet rigid enough to hold a straight line.
Step Two: Choosing the Correct Height for Measurement
The standard height for measuring tree girth is 4.5 feet above ground level. This is because at this height, the tree’s diameter is likely to be consistent and won’t be affected much by the root flare at ground level, nor the tapering and branching higher up.
Step Three: The Measurement Process
Stand with your back to the tree and hold the end of the measuring tape at chest level (4.5 feet). Wrap the tape around the tree making sure it is level and fits snugly against the bark. It should not sag or tilt.
Step Four: Reading the Measurements
Now, to read the measurement, align the zero mark on the tape with the remaining part of the tape. The point where the zero mark meets the tape indicates the girth of the tree in inches or centimeters depending on the measuring tape you are using.
Step Five: Recording the Measurements
Do not rely on memory for this. Ensure you record your measurements as soon as you read them off the tape. Note down the results in your notepad. If you’re measuring several trees, it might also be useful to mark each tree with a non-destructive marker to keep track.
Interpreting the Measurements
Understanding the significance of tree girth involves more than just taking measurements. For instance, a tree with a larger girth is generally older than one with a smaller girth. However, remember that different tree species grow at different rates, so girth is not a definitive measure of age.
Environmental factors like climate, sunlight, and water availability can affect tree growth. A tree with a large girth in a favorable environment might be younger than a tree with a small girth in less favorable conditions.
Common Errors to Avoid During Measurement
There are a few pitfalls to avoid during this process. First, ensure the tape is level. An uneven measurement could provide a false reading. Secondly, do not apply too much tension on the tape. This could compress the bark and generate a smaller girth value. Lastly, make sure you’re measuring at the standard height of 4.5 feet. Measuring at a different height could yield inconsistent results across different trees.
Tree girth measurement is a simple yet rewarding task. Not only does it give you an idea about the age of the tree, but it also helps monitor their health and growth over time. Remember to be gentle with the trees during your measurements! Happy measuring!

As we’ve journeyed through the compelling field of tree girth measurement, we’ve seen how it is much more than just reading a tape measure. The tree’s species, shape, and even its irregularities can significantly impact the results. We have explored the importance of precision in techniques, and the knowledge of interpreting the measurements alongside learning about the common errors to avoid. Mastering this skill enables us to appreciate trees in a new dimension and make meaningful contributions to forestry, ecology, or any nature-related field. Therefore, as you look at each tree now, may you see it not just as an organism, but also as a diverse repository of data, stories, and lessons waiting to be unraveled with your girth measurement skills.
